Modding:Asset Bundles
| Modding Getting Started |
Agent Component Overview |
Editing existing files |
Adding new assets |
Writing new code |
Contents
Asset Bundles
This is how you add new Sprites, Animations, GameObjects, Menus, and whatever else you might want to create.
All assets are created with Unity. It would help if you're familiar with Unity concepts before creating asset bundles, but you could also just learn by doing (much more fun)
Getting Started
First, you'll have to download Unity. Starmancer is currently using Unity version 2019.4.
I'm not sure how much the specific version matters, but you might as well download the exact same version that the game was built with.
Asset Bundles are created in Unity. You can view the unity documentation here. You're only interested in building Asset Bundles. You don't need to worry about how they're loaded (unless you're curious).
Once downloaded, just open Unity and create a new project. Name it whatever you want. We're going to use this project to export Asset Bundles.
Building Bundles
First, create whatever assets that you want (sprites, animations, gameobjects, etc)
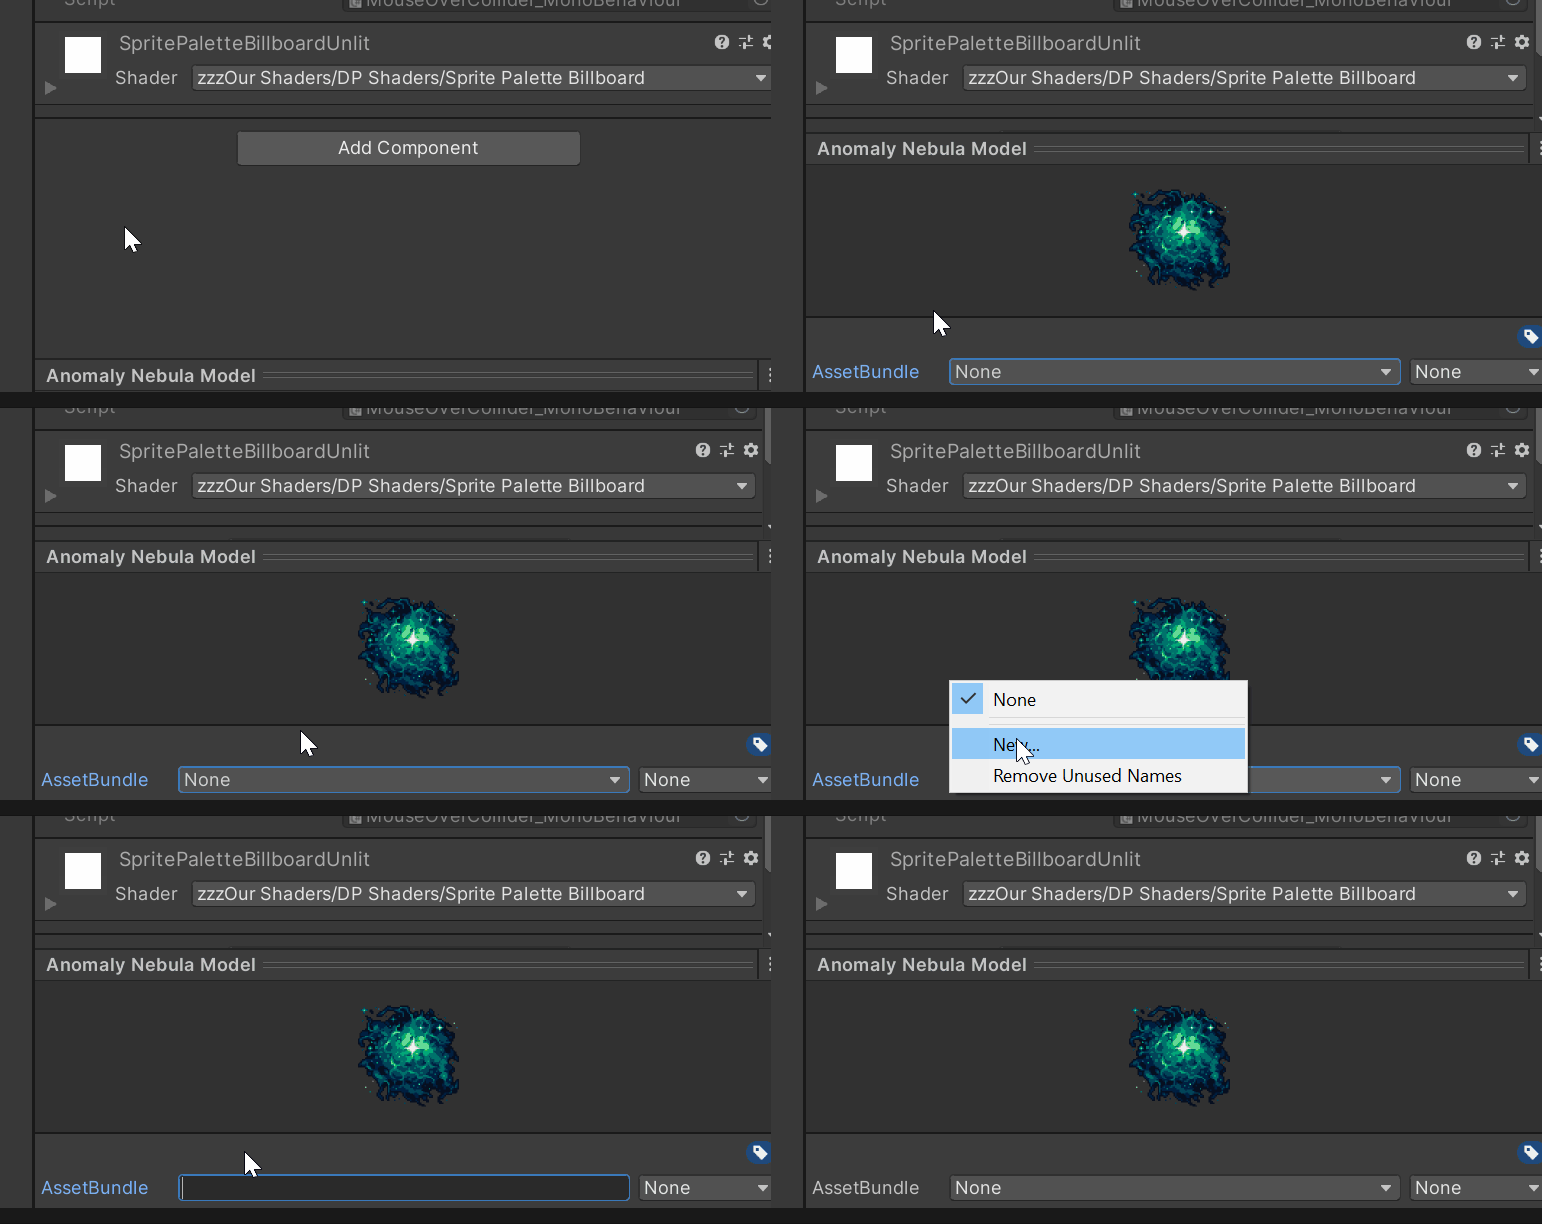
Then, select your asset in the project view (NOT the hierarchy). Select the bottom right of the inspector window. You can add multiple objects to the same Asset Bundle.
Bundle Building Code
Unity doesn't natively make it super easy to build asset bundles, but there's an easy fix (and one that I took directly from the Unity documentation above).
All you need to do is add the following code to any C# file in your project:
using UnityEditor;
using System.IO;

public class CreateAssetBundles
{
    [MenuItem("Assets/Build AssetBundles")]
    static void BuildAllAssetBundles()
    {
        string assetBundleDirectory = "Assets/AssetBundles";
        if(!Directory.Exists(assetBundleDirectory))
        {
            Directory.CreateDirectory(assetBundleDirectory);
        }
        BuildPipeline.BuildAssetBundles(assetBundleDirectory,
                                        BuildAssetBundleOptions.None,
                                        BuildTarget.StandaloneWindows);
    }
}
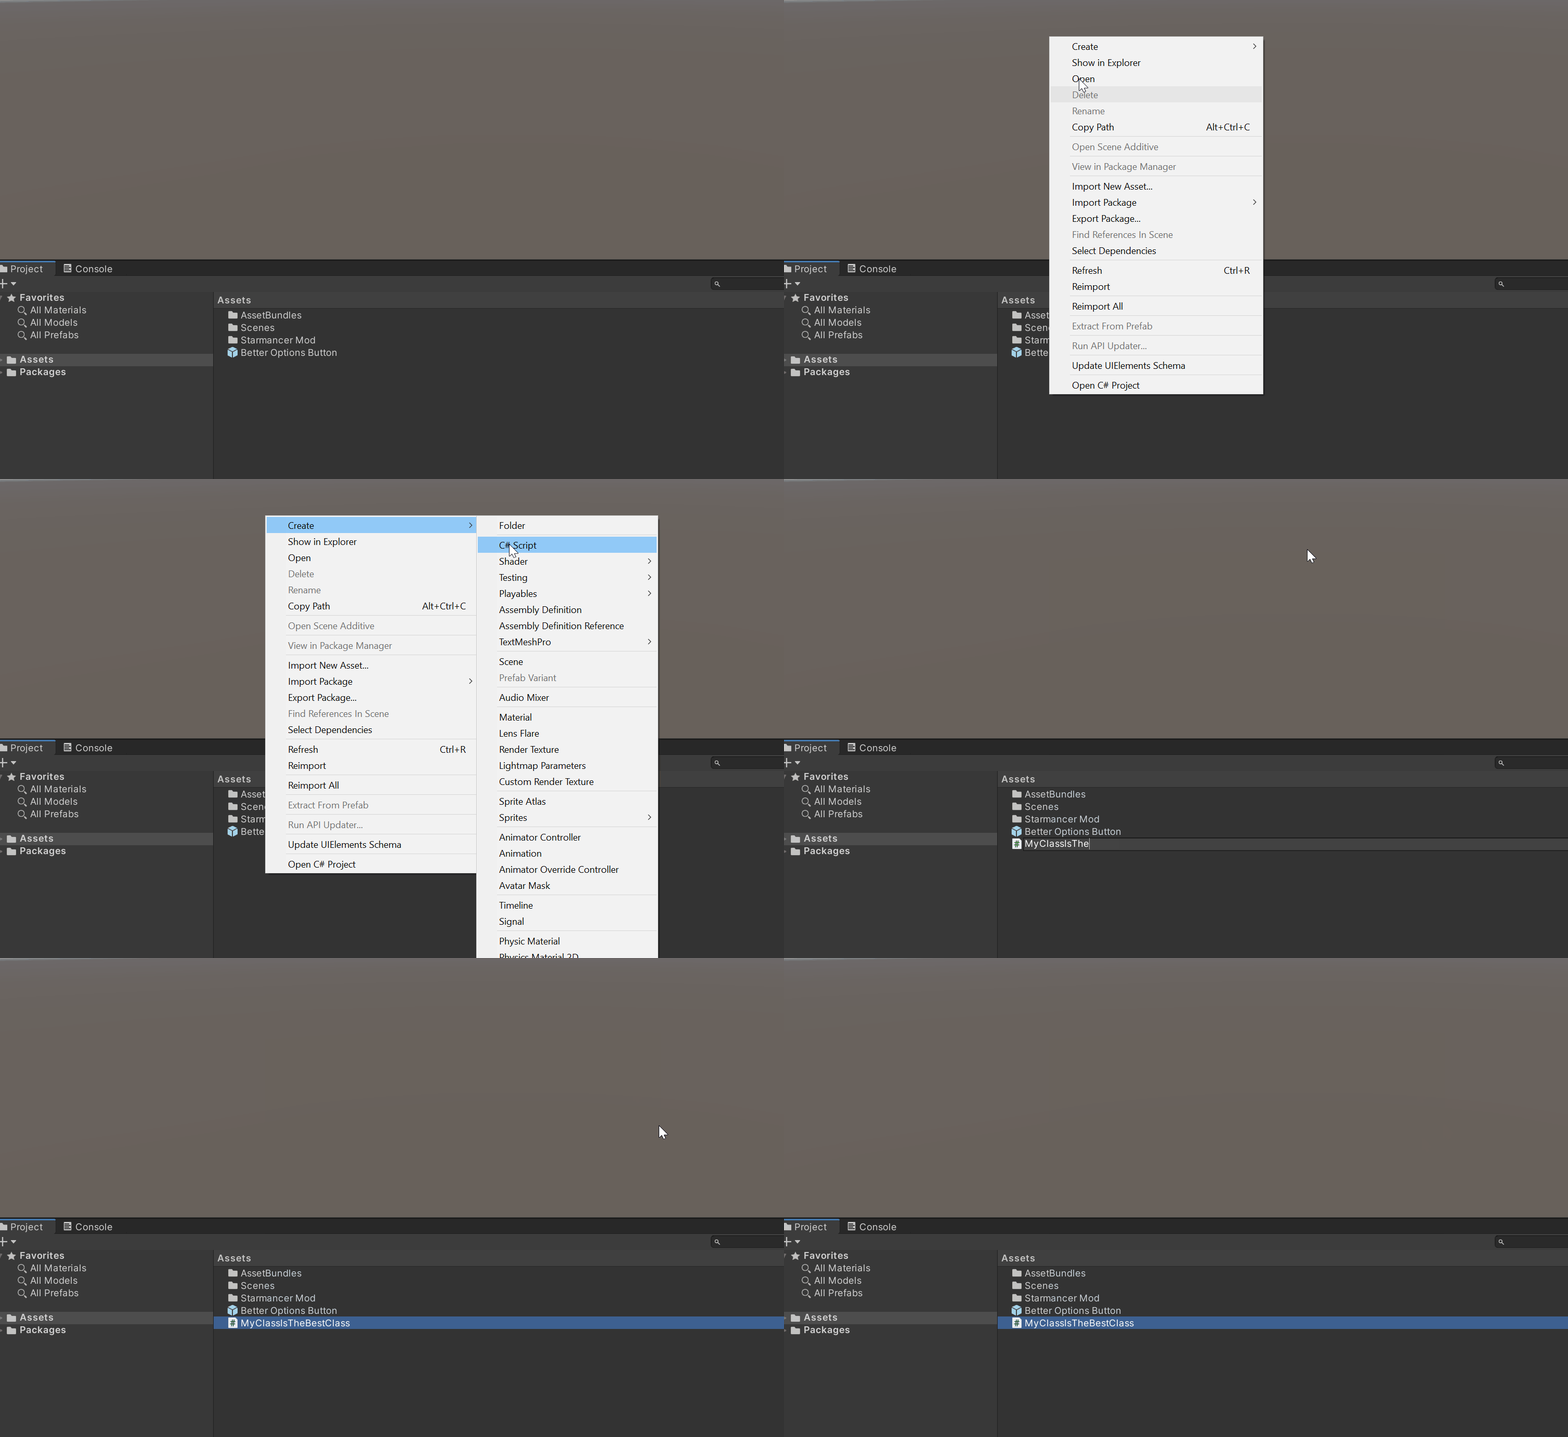
To create a script, do the following:
1. Right click in the project view and select Create > C# Script (name the script anything you want) 2. Open that file and paste the code (double click to open it. you can anything to edit the file, even notepad)
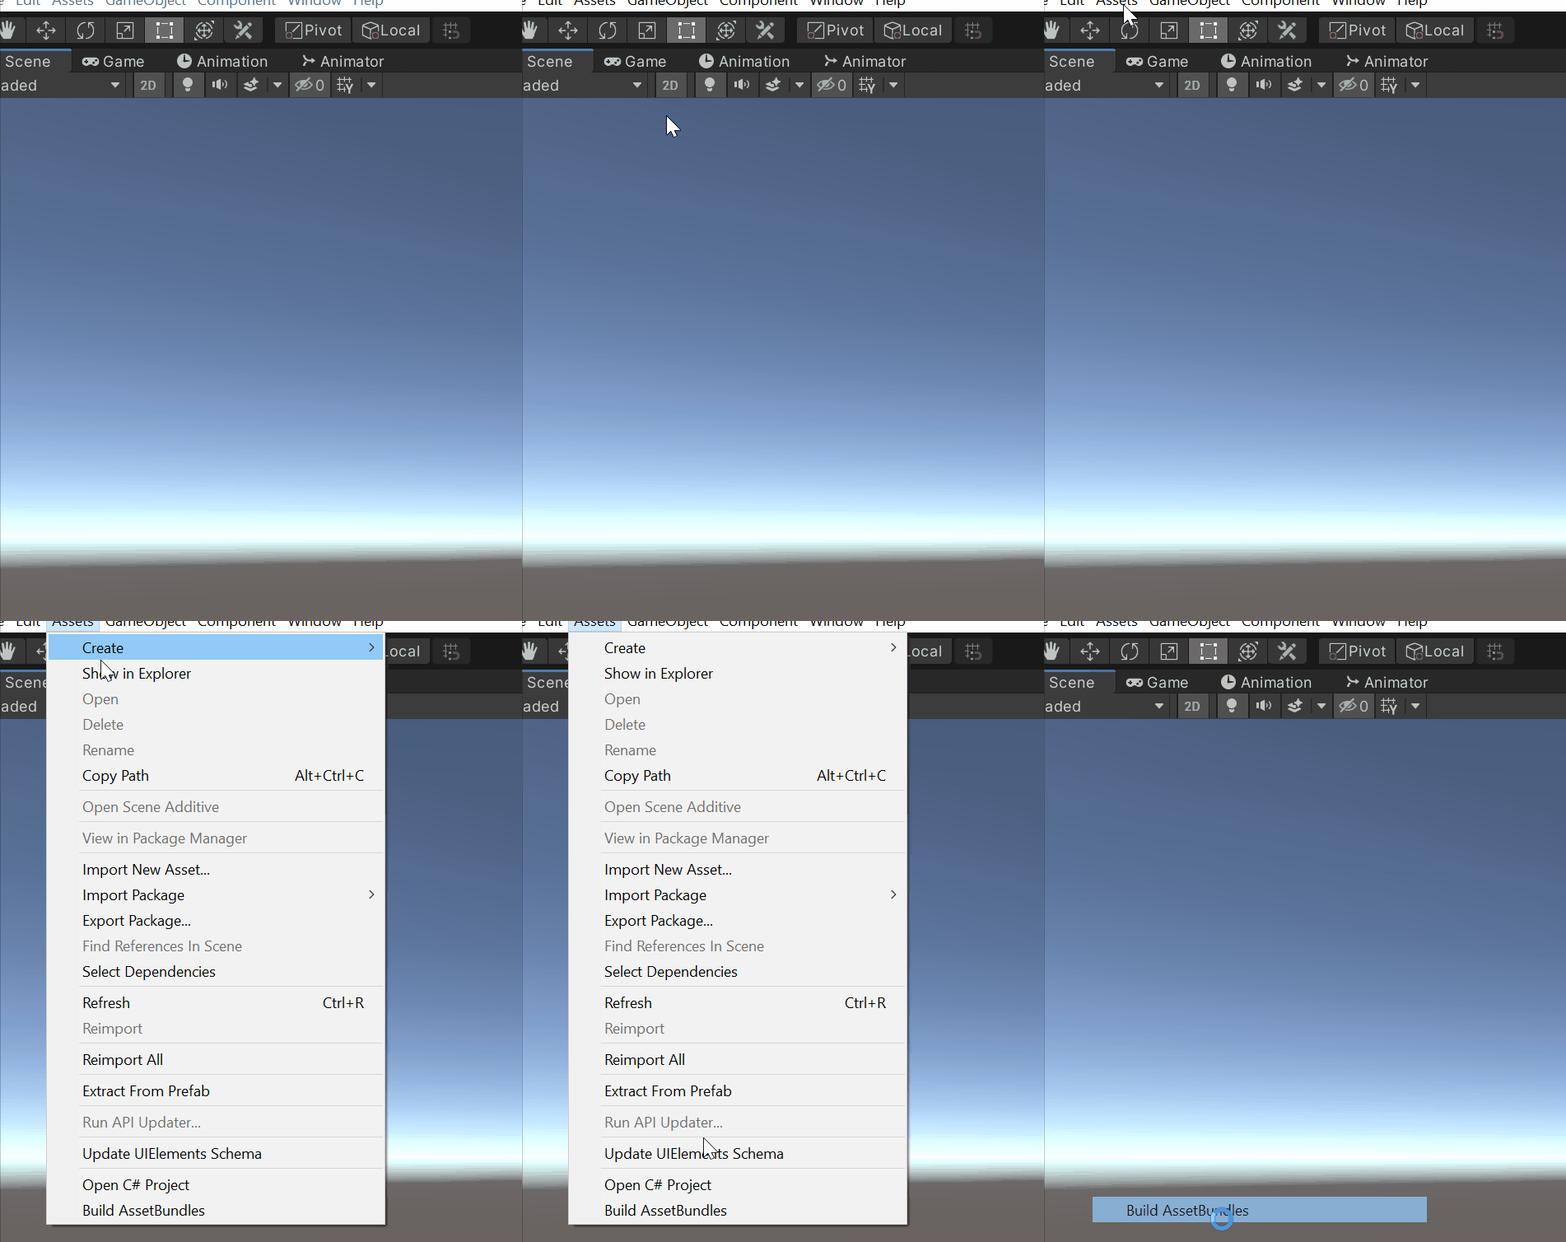
This will add a menu entry: Assets > Build AssetBundles. Click it
Doing Something Useful
If you followed the tutorial, you created an asset bundle, but it won't actually do anything in the game yet.
You'll have to edit some xml to associate your new content with an agent. If you're not familar with the XML system in Starmancer, you can read about it, here.
Once you're familiar with the XML system, you'll need to find "StarmancerMod.dll" and add it to your created Unity project (it's located in the Starmancer installation directory). Copy and paste it into your Assets folder.
Once you've added this file, you'll have access to a huge number of scripts, the most important one is LibraryModifier_MonoBehaviour.
Object Libraries
All assets in Starmancer are assigned a unique identifier. This identifier is a number. (for performance, the assets are stored in an array, so the identifier is the literal element index)
In xml, the assets are referenced like this:
<CreditEntity>
    Name:Credit Entity
    <componentLookup>
        <Component>
            type:Interface.Menu.Window.Element.WindowImageElementComponent
            recordID:84b51e78-20fc-4e54-933b-58aaa5c67641
            elementType:Icon (Sprite)
            sprite:736
        </Component>
    </componentLookup>
</CreditEntity>
In this case, the Credit Entity is using sprite 736 as its icon when displayed in the UI.
Library Modifier
In order to associate your asset with an agent, you need to give it a unique identifier. For compatibility reasons, the ID has to be an integer (within the range -2,147,483,647 to +2,147,483,647, giving you around 4 billion possible numbers to use).
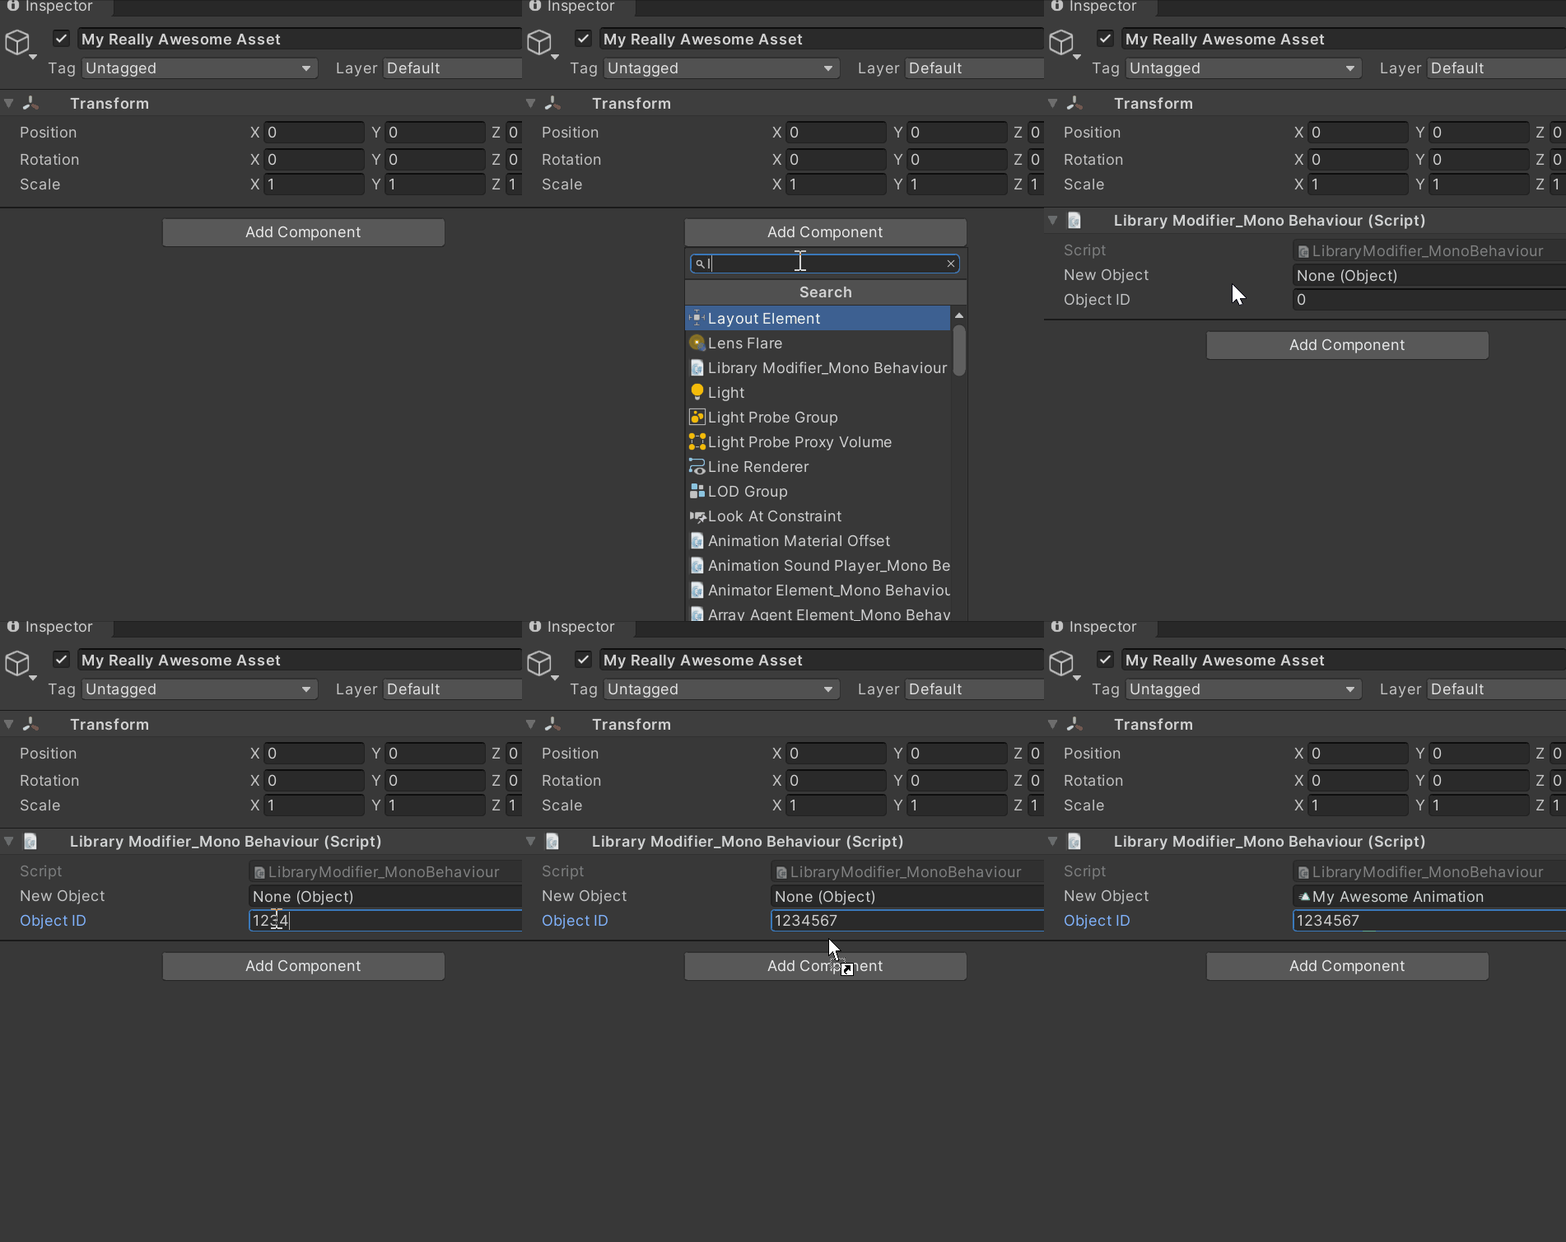
To assign ID's, create a new GameObject, and give it the script LibraryModifier_MonoBehaviour. To add scripts click the GameObject, and select "Add Component" in the inspector window. You can filter the results.
Drag and drop your asset to this script. You can add multiple LibraryModifiers to the same GameObject.
The current supported assets are: Sprite, Material, Mesh, GameObject, Texture2D, and RuntimeAnimatorController
**SUPER IMPORTANT** You have to add your GameObject with the LibraryModifier script to your asset bundle (if you don't, the script won't actually be included in your bundle, so it wouldn't do anything). You'll have to convert this GameObject into a prefab by dragging it from the Hierarchy to the Project view.
Note: You can deliberately give your asset the same identifier as an existing asset. Doing so will overwrite the stored asset with your new one (and doesn't require any XML editing). This is very useful if you want to replace a vanilla asset with your own (maybe you created a better Toilet Model, for example)
Asset Bundle Files
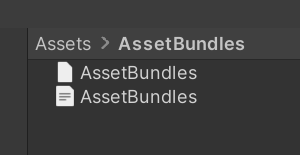
Rebuild your asset bundles (go to Asset > Build Asset Bundles) Once built, you'll see at least 2 files: AssetBundles and AssetBundles.manifest
You can rename these to whatever you want, like "MyReallyAwesomeAssetBundle".
Next, move BOTH files to your Starmancer installation directory data/Mods/
By the way, you can right click any asset in Unity and "Show in Explorer" to open the file location
Adding XML
Almost done. The last thing we need to do is associate your new asset with some component / agent (unless you deliberately used the same asset ID as an existing asset, to override it).
You'll have to look through agents.xml to find the agent and location where you want to make changes.
Here's an example, where I replace the sprite used by Credit Entity's WindowImageElementComponent to sprite 9382739.
Notice how I only needed to provide the recordID of the component I was interested in. Every component has a unique ID (it's a GUID).
<xml>
    name:agents
    <CreditEntity>
        Name:Credit Entity
        <componentLookup>
            <Component>
                recordID:84b51e78-20fc-4e54-933b-58aaa5c67641
                sprite:9382739
            </Component>
        </componentLookup>
    </CreditEntity>
</xml>
Place this file under data/Mods (in the Starmancer installation directory)
That's It
That's the basics of adding your own Asset Bundles. You can use this to literally add anything to the game.
